How to Use an Ab Mat: Correct Placement and Five Exercises That Use It Properly
The short version: the ab mat goes under your lower back, not under your tailbone, with the thick end toward your feet and the thin, tapered end toward your head. Set up that way, the wedge fills the natural arch of your lumbar spine and lets your torso extend back slightly past flat — which is the entire point, because it gives you a longer range of motion at the top of the sit-up and takes the pressure off the tailbone that makes floor sit-ups unpleasant. Almost every complaint about ab mats traces back to placing it too low, under the glutes or tailbone, which tips your pelvis the wrong way and does nothing useful. Get the position right, anchor your feet in a butterfly or straddle, touch your hands overhead behind you at the bottom and in front of your feet at the top, and you have the full-range sit-up CrossFit boxes program. Our pick is the REP Fitness Ab Mat, which has the lumbar contour and the foam density to hold its shape through that work.
Affiliate disclosure: Trusted Health Gear is an Amazon Associate. If you buy through links on this page, we may earn a commission at no extra cost to you. Commission does not influence our rankings. Full policy.
What an ab mat is actually for
An ab mat is a contoured foam wedge, not a cushion. The shape is the product: one thick end, one tapered end, and a curve in between that is meant to match the lordotic curve of your lower back. When it sits in the right place it does two separate jobs. First, it supports the lumbar spine through the bottom of a sit-up so your back is not hanging unsupported over a hard floor. Second, and more importantly, it raises your lower back enough that your torso can extend slightly past flat at the bottom of the rep — which lengthens the range of motion and loads the abdominals across more of their actual range rather than cutting the movement short where the floor stops you. That extra range is why the mat exists and why it is standard kit in CrossFit boxes, where the prescribed sit-up goes from hands touching the floor behind your head to hands touching the floor in front of your feet. It is also why a folded towel is a poor substitute: a towel is cushioning without a shape, so it solves the comfort problem and not the range problem.
Correct placement, step by step
Sit on the floor with your knees bent and feet flat. Slide the mat behind you so the thick end is nearest your feet and the tapered end points toward your head — if you lie back and the mat feels like it is tipping you forward, you have it the wrong way round. Now the part people get wrong: the mat belongs under your LOWER BACK, roughly from the top of your pelvis up to the bottom of your ribcage. Your tailbone should be on the floor, not on the mat. If the pad is under your glutes or tailbone, your pelvis tips backward, your lumbar spine flattens, and you lose both the support and the extra range you bought it for. Lie back and check two things. Your lower back should feel filled in — the mat should be in contact with your lumbar curve rather than leaving a gap. And you should be able to extend back so your shoulders go slightly below the level of your hips, with your hands reaching the floor overhead behind you. If you cannot reach the floor behind you, you are either too far up the mat or your mat is too thick for your flexibility. Adjust by a couple of inches and try again; the correct position is obvious once you have found it once.
The full-range sit-up: how the rep actually goes
This is the exercise the mat was designed around. Set the mat under your lower back as above. Position your legs in a butterfly — soles of the feet together, knees out to the sides — or in a straddle with legs wide and knees slightly bent. Both positions take the hip flexors out of the equation more than a standard bent-knee foot-anchored position does, which keeps the work in the trunk and is why boxes program it that way. Lie back fully, arms overhead, and touch the floor behind your head with your hands. From there, initiate by exhaling and curling your ribcage toward your pelvis rather than yanking with your arms — the first part of the movement should be your spine flexing, not your shoulders lifting. Come all the way up and reach your hands to the floor just in front of your feet. Then lower under control, not by collapsing, and touch the floor behind your head again. That is one rep. Breathe out on the way up and in on the way down. Two common faults: throwing the arms to generate momentum, which turns a core exercise into a swing, and keeping the feet actively hooked under something and pulling with the hip flexors, which shifts the work to the front of the hips and is a common source of hip-flexor soreness.
Four other ways to use the pad
The mat is more versatile than its name suggests. Hip thrusts and glute bridges: place the mat under the upper back, not the lower, to raise your shoulders slightly and give the hips room to extend fully — a cheap substitute for a bench if you do not have one. Decline push-ups and pike work: use the mat under the hands to change the angle slightly, or under the feet to elevate them. Hollow holds and dead bugs: set the mat under the lumbar spine as for a sit-up and it helps you feel whether your low back is staying in contact or arching away from the floor, which is the whole technical point of both exercises. Neck and thoracic support: lying over the thick end lengthwise gives a mild extension stretch across the upper back, which feels good after a day at a desk and takes thirty seconds. Two things not to use it for: as a knee pad for ab-wheel rollouts, where it is the wrong shape and will roll, and as a general exercise mat, which it is too small and too firm to be — that is a different product.
What to look for when buying one
Four specs, and the first two matter far more than the price difference between models. Foam density is the big one: a cheap pad made from low-density foam compresses under body weight within weeks, which collapses the wedge shape and turns your ab mat into a thin flat cushion. High-density foam that holds its shape is the single thing worth paying a few dollars more for. Contour shape is second — you want a genuine wedge with a pronounced lumbar curve, not a mildly domed rectangle, because the curve is the mechanism. Third, size: a larger pad gives more surface and suits taller lifters and anyone who finds themselves sliding off the edges of a small mat during fast reps, while a compact pad stores more easily and is plenty for most people. Some designs add a separate flat tailbone panel, which is a genuine comfort feature if the bony contact at the base of your spine is what bothers you. Fourth, cover: a wipe-clean vinyl-style cover is close to mandatory, because this is a sweat-contact item lying under your bare back. Beyond those four, there is very little to distinguish ab mats, and the honest news is that this is a cheap category where the best option costs about the same as a month of a gym membership.
The ab mats we'd actually buy
Every pick below is already reviewed and scored in our roundups — same products, same specs, with live Amazon prices.
| Attribute | REP Fitness REP Fitness Ab MatOur pick | Power Guidance Power Guidance Ab Exercise Mat (Sit-Up Pad) | SPRI SPRI Ab Mat (Curved Core Support) |
|---|---|---|---|
| Best for | Best overall — thick, supportive foam and a lumbar-friendly shape from a respected garage-gym brand | Best larger pad — a bigger sit-up surface for full-range work and lifters who slide off small mats | Best budget contoured pad — a genuinely curved core-support mat from a known accessory brand for very little money |
| Who it's for | For most readers: a genuine lumbar contour in foam dense enough to hold its shape through high-rep work, from a brand with a real garage-gym track record rather than a generic import. | For taller lifters and anyone who finds themselves sliding off a small pad during fast reps — a bigger sit-up surface sized for genuinely full range of motion. | For the reader who wants the correct curved shape at the lowest sensible spend, and does not need the extra size or foam density of the picks above. |
| Key specs | Thick foam pad with lumbar-support contour · wipe-clean cover · compact footprint for home-gym storage · marketed for sit-ups, core training, and lower-back support · from REP Fitness, an established garage-gym equipment brand | Larger sit-up pad sized for full range of motion · contoured for abdominal and core training · wipe-clean cover · tailbone and lower-back support · marketed for full-ROM ab workouts · commonly in stock on Amazon | Curved core-support contour for sit-ups and crunches · compact, lightweight design · wipe-clean cover · from SPRI, a long-running fitness-accessory brand · budget-friendly price · commonly in stock on Amazon |
| Our score | 8.2/10 | 7.6/10 | 7.3/10 |
| Where to buy |
Prices pulled from Amazon as of October 18, 2026 and are subject to change. The price shown on Amazon at checkout applies.
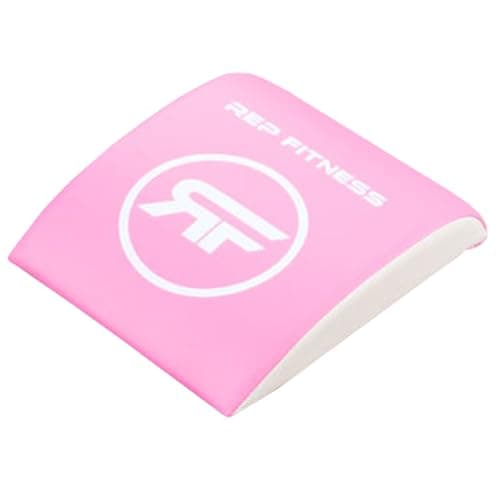
REP Fitness — REP Fitness Ab Mat
For most readers: a genuine lumbar contour in foam dense enough to hold its shape through high-rep work, from a brand with a real garage-gym track record rather than a generic import.
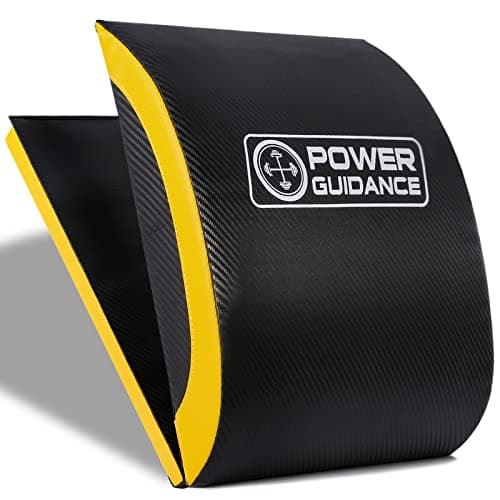
Power Guidance — Power Guidance Ab Exercise Mat (Sit-Up Pad)
For taller lifters and anyone who finds themselves sliding off a small pad during fast reps — a bigger sit-up surface sized for genuinely full range of motion.
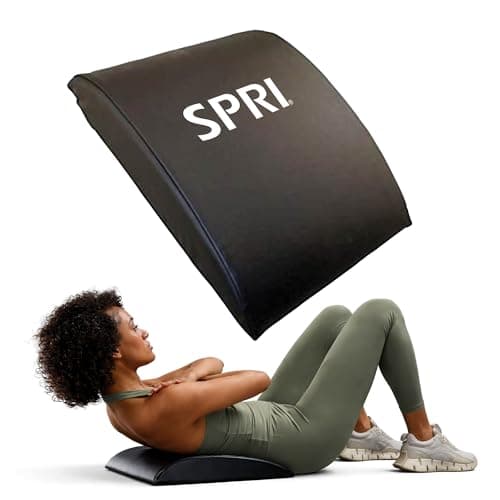
SPRI — SPRI Ab Mat (Curved Core Support)
For the reader who wants the correct curved shape at the lowest sensible spend, and does not need the extra size or foam density of the picks above.
Common mistakes and how to fix them
Five faults account for most ab-mat problems. Placing it too low, under the tailbone or glutes — the single most common error, and the fix is to slide the pad up until your tailbone is on the floor and the pad fills your lumbar curve. Using momentum: throwing the arms and bouncing off the bottom turns the exercise into a swing and is also how people tweak their necks, so slow the eccentric down and initiate by curling the ribs toward the pelvis. Pulling with the hip flexors: if the front of your hips is what gets sore, switch to a butterfly or straddle leg position and stop actively hooking your feet under anything. Chasing reps on the clock: high-rep sit-ups done badly are a reliable way to irritate a low back, and a set of twenty controlled reps beats fifty sloppy ones for every goal you might have. And neck pain: if your neck hurts, you are pulling your head forward with your hands behind it, so put your fingertips lightly at your temples or reach your arms overhead instead, and keep your chin in a neutral position rather than tucked hard to your chest.
When not to use one, and what to do instead
Sit-ups are a spinal flexion exercise under load, and flexion is not right for every back. If you have a history of disc injury, significant or recurring low-back pain, a hernia, abdominal separation after pregnancy (diastasis recti), or you are pregnant or recently postpartum, get individual guidance from a physiotherapist or your doctor before adding repeated loaded flexion. In many of those situations the better starting point is anti-extension and anti-rotation work — planks, side planks, dead bugs, bird dogs and loaded carries — which trains the trunk to resist movement rather than produce it, and which has at least as much carryover to lifting. That is a clinical judgement rather than something a web page should make for you. Regardless of history, sharp pain, numbness, tingling or pain radiating into a leg is a stop-and-get-assessed signal, not something to train through. And a general note worth repeating: no amount of sit-ups reduces abdominal fat, because spot reduction is not a mechanism — visible definition comes from a calorie deficit with enough protein and resistance training to hold onto muscle. Train the core for strength and trunk stiffness, which transfers to your squat, deadlift and carries. This is general fitness information, not medical advice.
Frequently asked questions
Under your lower back, with the thick end toward your feet and the tapered end toward your head. The precise landmark: the pad should sit roughly between the top of your pelvis and the bottom of your ribcage, filling the natural arch of your lumbar spine, with your tailbone resting on the floor rather than on the mat. That is the whole setup, and getting it wrong is the source of almost every ab-mat complaint. If you slide the pad too low, under your glutes or tailbone, your pelvis tips backward, your lumbar curve flattens, and you lose both the lumbar support and the extra range of motion that the wedge is there to provide. Two quick checks once you lie back: your lower back should feel filled in rather than leaving a gap over the pad, and you should be able to extend back far enough to touch the floor overhead behind your head with your hands. If you cannot reach the floor behind you, slide down a couple of inches and try again — the correct position is unmistakable once you have found it.
Related reading
Sources
- Core Muscle Activity During Physical Fitness Exercises — review of trunk muscle activation across common core exercises — International Journal of Environmental Research and Public Health, 2020
- Electromyographic analysis of abdominal muscle activity during curl-up and sit-up variations — Journal of Strength and Conditioning Research
- Regional fat changes induced by localized muscle endurance resistance training (spot reduction not supported) — Journal of Strength and Conditioning Research, 2013
- Physical Activity Guidelines for Americans, 2nd edition — muscle-strengthening activity recommendations — U.S. Department of Health and Human Services, 2018
- Product titles, dimensions, foam construction, live prices and availability for the ab mats referenced — retrieved via the Amazon product data layer — Amazon product listing data, 2026
REP Fitness — REP Fitness Ab Mat
$29.99 · on Amazon