How to Measure Your Blood Pressure at Home Accurately
To get an accurate home reading, use a validated automatic upper-arm cuff and prepare properly: no caffeine, exercise, or smoking for 30 minutes beforehand, empty your bladder, and sit quietly for five minutes first. Sit with your back supported, feet flat on the floor, legs uncrossed, and rest your bare arm on a table so the cuff sits at heart level. Wrap the correctly sized cuff snugly on bare skin, stay still, and do not talk during the measurement. Take two or three readings a minute apart, at the same time each day, and record the average. This guide covers technique only — a home monitor does not diagnose or treat anything, so review your numbers and any concerns with your doctor.
Affiliate disclosure: Trusted Health Gear is an Amazon Associate. If you buy through links on this page, we may earn a commission at no extra cost to you. Commission does not influence our rankings. Full policy.
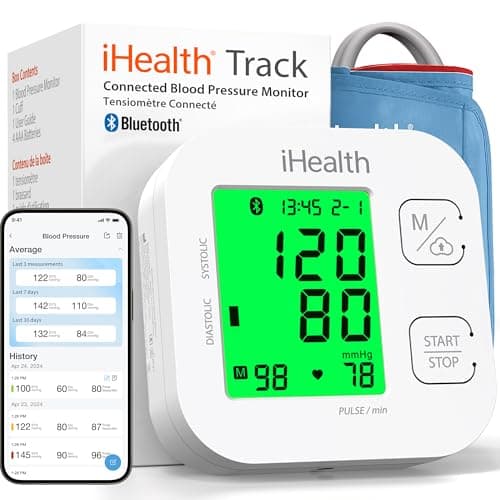
iHealth — iHealth Track Smart Upper Arm Blood Pressure Monitor
Best budget smart monitor — an inexpensive upper-arm cuff with clean app logging and phone sync
Choose a validated, correctly sized monitor
Accuracy starts with the device. The American Heart Association recommends an automatic, cuff-style monitor that wraps around your upper arm rather than a wrist or finger model, which are more sensitive to position. Look for a monitor that has passed independent validation for accuracy; in the U.S., validatebp.org publishes a list of home devices that have cleared a validation protocol. Cuff size matters just as much as the device itself. A cuff that is too small or too large will give inaccurate results, so measure around your upper arm and match it to the manufacturer's size chart before buying — many people need a large cuff and do not realize it. Once you have the monitor, it is worth taking it to a checkup so a reading can be compared against the office equipment and your technique confirmed.
Prepare before you measure
What you do in the half hour before a reading changes the number. The AHA advises avoiding caffeine, cigarettes or nicotine, and exercise for at least 30 minutes before measuring, since all of them can temporarily move your reading. Empty your bladder first — a full bladder can affect the result. Then sit quietly and rest for five minutes before you start; do not measure the instant you sit down or right after walking around. Put your phone down and skip conversation during that rest and the reading itself, because talking and mental activity nudge the number up. Try to measure when you are relaxed rather than rushed or stressed. None of this is about gaming the result — it is about producing a consistent, comparable reading each time so your record actually reflects your resting blood pressure.
How to sit: body position that matters
Body position has a measurable effect, so set up carefully. Sit in a chair with a back, not on a stool or the edge of a bed, and keep your back supported and upright. Put both feet flat on the floor and do not cross your legs or ankles — crossed legs can raise the reading. Rest your arm on a table or desk so it is supported; a dangling or held-up arm makes your muscles work and skews the number. Position everything so the middle of the cuff sits at the level of your heart. Sit still and stay quiet through the whole measurement. If your arm is unsupported, too low, or too high relative to your heart, the reading drifts, which is exactly why the same relaxed, supported posture every time is what makes your numbers comparable.
Cuff placement on a bare arm at heart level
Put the cuff on a bare arm, not over a sleeve, and roll up or remove tight clothing rather than pushing a sleeve into a tight band above the cuff. Wrap the cuff snugly around your upper arm — you should be able to slip a fingertip or two under the edge, but it should not be loose. Most cuffs have a marker or artery indicator that should line up over the brachial artery on the inside of your arm; position the bottom edge of the cuff about an inch above the crease of your elbow. Support that arm on a table so the cuff sits at heart height. Use the same arm each time you measure, since readings can differ between arms. Then hold still, stay quiet, and let the monitor run without moving or tensing your arm.
Take multiple readings and average them
One reading on its own can be misleading, so the AHA recommends taking two or three measurements, about one minute apart, and recording them. Blood pressure naturally varies from beat to beat and minute to minute, so an average of several readings is more representative than any single number. Leave the cuff in place between readings and simply wait the minute rather than taking the cuff off and re-wrapping it each time. Write down every reading, or use a monitor or app that stores them, rather than keeping only the lowest one. Do this at the same times each day so the readings are comparable. The goal is a stable pattern over time — a run of averaged, consistently taken readings tells you far more than a single spot check ever could.
When to measure and keeping a log
Consistency over time is what makes home monitoring useful. Measure at the same times each day — many people take readings in the morning before eating, medication, or coffee, and again in the evening — so the conditions match from day to day. Do not measure only when you feel off, and do not re-measure over and over chasing a number you like; that just adds stress and noise. Keep a simple log with the date, time, and each reading, or let the device store them, and bring that record to your appointments so your doctor sees real-world numbers rather than a single office reading. If your doctor has given you specific instructions on how often or when to measure, follow those. A clean, consistent log is the real deliverable of home monitoring.
What your numbers mean is a conversation for your doctor
This guide is about technique, not interpretation, and that distinction matters. A home monitor is a measuring tool — it does not diagnose, treat, or manage any condition, and this article is not medical advice. The American Heart Association publishes blood-pressure categories, but deciding what your particular readings mean, whether they are a concern, and what if anything to do about them is a conversation for you and your doctor, who can weigh your full health picture. Do not start, stop, or change any medication based on a home reading, and do not diagnose yourself from a chart online. If you get an unusually high reading, or you feel unwell, contact your healthcare provider or follow the emergency guidance they have given you. Take your log to appointments and let a professional interpret it.
iHealth — iHealth Track Smart Upper Arm Blood Pressure Monitor
Frequently asked questions
Use the same arm each time so your readings stay comparable, since results can differ slightly between arms. Rest that arm on a table so the cuff sits at heart level, and place the cuff on bare skin. If your doctor has told you to use a specific arm, follow that guidance.
Sources
- Monitoring Your Blood Pressure at Home — American Heart Association (AHA)
- US Blood Pressure Validated Device Listing — American Medical Association / validatebp.org
- Measure Your Blood Pressure — Centers for Disease Control and Prevention (CDC)
- Get the most out of home blood pressure monitoring — Mayo Clinic
iHealth — iHealth Track Smart Upper Arm Blood Pressure Monitor
$39.99 · on Amazon